Monday, June 14, 2010

Connection technique; joining any combination of materials together.

Although I can silver solder, there are times when other methods of joining are required, or I just fancy a change, or a design warrants the look of little rivets. All my work is either soldered or riveted. "Rivets" sounds technical, sounds 'hardware store', but it needn't be. The great thing about rivets is that you can make them yourself, very very easily, you can  connect together any materials you like, they have a beautiful decorative look to them, they're easy to make and use and they can even become the essence of your jewellery or mixed-media artwork. Best of all, it's smarter, more sophisticated, more permanent and more satisfying than using glue. Glue has it's place, but consider rivets.

Here is a sample I made to show you how to rivet, I'm going to show you how to Tube Rivet and how to Wire Rivet. You see a piece of wood, rusty steel, embossed copper shape, snippet of tin can, scrap of fabric and a shard of plastic.

TUBE RIVETING.
1. You can buy lengths of very small diameter, round tube in copper, brass and alluminium from model shops. You can buy silver and gold tube from your jewellery suppliers. You can make your own tube too, but I wont go into that here.

2. Here are all the materials waiting to be connected together.

3. Choose the tube you want to make your rivets out of. Find a drill bit that's the same diameter, like above.

 
4. Drill a hole through all the pieces to be joined. The tube should be a snug fit in the holes. The little copper rectangle shape you see in the 2nd picture, is a 'washer' I made to stop the tube rivet from sinking into the soft squashy wood. Your 'sandwich' of materials need to have the outer layers consisting of hard materials, or else make a washer. Your washer could be a tiny little disc with a hole in it, mine is a shape you can see for the purpose of this excercise.

 
5. Next, you need to saw a piece of your tube down to the right length for a rivet. You want the tube to protrude from each side of your sandwich by no less than 1mm and no more than 2mm. If your tube is too long, it will bend over when riveting and look ugly. Too short and the tube will disappear in the hole. Here is the back of my sample, the rectangular shape is the washer that stops the tube being pulled into the soft wood.

6. Here I am using a basic tube vice (chenier vice) to hold my tube while I saw through it with my sawblade to the right length. You don't need one of these, but it is important that each end of the tube is sawn flat and perpendicular to the tube.

7. Now, with tube section threaded through your sandwich, place you sandwich of materials onto a flat steel block. Use a pointed punch (you can make one by filing a cheap hardware store nail to a point) to flare out the protruding tube, by tapping gently with a hammer or mallet.

8. Gently flare out the other end of the tube by turning over your sandwich and tapping your punch point into the tube again, as before.

9. When the tube ends are flared and the connection is well and truly made, use the round head of a hammer to finish the flare / spreading of the tube end...

10.  ...and then use the flat head of a hammer to make the rivet flat. Your tube rivet connection is complete. There are variations on this simple way of doing a tube rivet, you could solder the tube onto the back of the metal so that only one side shows the distitinctive little 'donut' of the rivet (blind rivet). You could re-drill your hole very slightly, not all the way through, with a larger drill bit to create a dimple which would allow the donut to lie flush with the rest of the surface.

WIRE RIVETING.
1.  Once again, your materials need holes drilled through them that are the same diameter as the WIRE you want to make into a rivet. Again, the wire needs to protrude at the top of the sandwich by about 1.5mm and by about 1.5mm at the back of the sandwich, as you can see here above.


2.  As with step 6 of the tube rivet, place your materials with the wire in place onto a steel block. Now instead of using a punch, just use the round head of your hammer to tap the head of the wire...as in the above illustration. The black circle represents the flat protruding end of the wire. Your hammer blows should start in the centre of the circle and spiral outwards to gradually spread the head of the wire. You can also hit around the edge of the circle by 'stroking' your hammer blows outwards, as described by the orange arrows. Do a little on one side of the sandwich then turn over and do a bit on the otherside, same as for the tube rivet.

3. Here you can see how the end of the wire has spread into a sparkly little rivet head.

4.  Here on the back of the sample, you can see how much the rivet head has spread, compared to an offcut of the wire in its original condition.


Here are 3 books I own that concentrate on "cold connections" of many kinds. I recommend them all! (I do not represent the publishers or authors).  I hope you enjoyed this tutorial and found it helpful and inspiring.

Thursday, June 10, 2010

Charm Swap 6

We have time for the charm swap and not much progress right now
"I just moved my studio - it's not finished yet but I've decided to begin my charms.
On the previous post I told you what I want to do - I am doing Hamsa charms with turquoise. I am not sketching, I planed the materials I am going to use, prepare all in advance and the design coming up on the bench - I flow with my designs.
I went to buy the turquoise stones - They are gorgeous!
I had decided on the Hamsa shape and began to saw them....


To be continue next week....."

Looking forward to hear and post your progress !


Wednesday, June 9, 2010

Carving a wedding ring from wax, part 2

Hi! For those of you who didn't see part one of this post, Susan and Jason chose "Stitches" for their wedding bands and I am blogging about the process of carving their bands out of wax, to be cast in 14 karat white gold. This is part two in the process.

The following two pictures are the tools I will use to carve the details into the wax. I use dividers for marking precise guidelines and gravers for carving the detail. The second photo shows some of the files I use, one specifically for wax and the others are cheap-o's I got at Lowe's. They are a pretty coarse cut that removes a controllable amount of wax but don't clog up with the wax debris.


The next step is removing some of the wax that I was to chicken to remove with the lathe...live and learn. I measure first to get the initial thickness (with my awesome new digital caliper!) which is 3mm. I would like the thickness to be 2.2mm.

My next step is to measure and mark the .08 mm I want to remove, which I do with a rotary file. This is an amazing tool, I use it for carving all my waxes and for removing metal when I need to move quickly. It leaves a nice surface that doesn't need much cleanup.


I was taught to use gravers for the next step. There are lots of ways to carve waxes but this is the way that works best for me. I think graver skills are so important for a bench jeweler or metalsmith to have. While FAR from an expert, my limited skills have helped me out of many jams and have been indispensable when carving pieces from wax. For rounding the outside and creating a comfort fit on the inside, I use, first, a #38 graver and then a #2. The #38 is a skinny flat graver and the #2 has a "V" shape. I use the sharp edge of the #38 to gently scrape wax away, creating a rounded edge, inside and out. I scribe a guide line first with a divider so everything stays nice and even.

When this step is done, I may run over the whole surface with 400 grit sandpaper but not always. I now have a ring blank that is ready for embellishments (sorry for the blurry pic), which I will cover in my last post, next Wednesday! Thanks for reading!!! See you next week!!!

Tuesday, June 8, 2010

2010 June: Blog Carnival


Welcome to the Etsy Metal Blog Carnival!

So you ask, "what is a blog carnival?"
It is group of EtsyMetal members who will collectively write a article on the monthly subject for their blog!

Our Topic for June 2010 is:
What / Who is your Studio Mascot(s)? 
Does he/she/it inspire you? Watch you? Encourage you? Impede your work? 
Enjoy!

Sunday, June 6, 2010

Etsy Metal Finds


One of the things I love about spring is the Peonies that bloom all around. There are so many different varieties--some you may not even realize are peonies until you look at the actual plant itself! Here are a few lovelies from over on Etsy. Enjoy!

Clockwise from Top Left:

Pretty in Pink 5 Peonies Set by A Dash of Color

Pink Peony Flower Prints by Jennifer Aitchison

1 Full Pink Peony Embellished with Large Crystal by Spamaluca

Oil Painting Peonies in a Jar by Art by Sonja

Wednesday, June 2, 2010

Carving a wedding ring from wax, part 1 - the lathe

A few weeks ago my friends, Susan and Jason, contacted me about wedding bands. Congratulations guys!! They chose the ring "Stitches" and because I love carving waxes, I thought it would be interesting to show how I will make their bands. Ordinarily, I don't use a lathe to rough out the ring blanks but my husband convinced me the lathe would make my blanks perfectly round and ready for carving the detail.

The first step in carving a wax ring is making the tube the correct ring size. In this first set of pictures, we are boring the correct inside diameter to make the ring Susan's size. If we are even off by a fraction of a millimeter, the ring will be too big. We take small passes and remove tiny ribbons of wax, checking after each run with a dial caliper.
The second step in making this ring blank is making the tube the correct outside diameter. Honestly, since this was my first time using the lathe, I chickened out and made the walls of the ring 3.5 mm when I really should have made them 2.5. It would have saved me a step later. We used a cutting tool to remove the wax, a little at a time, from the outside of the tube. Eventually we ended up with a tube that had the correct outside and inside diameter.
Posted by PicasaThis last step involves "facing" the ring and cutting the finished ring blank off the rest of the tube. In the first photo, we use a "facing" tool to cut across the end of the ring blank. In the second picture you can see that the ring is so perfectly symmetrical that, when it spins, you can't see any movement. In the third picture we are cutting the ring off at 6 mm. The last step shows a finished ring blank. There is some flashing where the ring broke away from the tube. This is removed later with a file.


So, now we have two ring blanks. Next week I will post again on the progress of these two wedding bands. I will be rounding the inside and outside of the ring using gravers and marking out where the pattern should be using a divider. See you next week!!

Tuesday, June 1, 2010

June Challenge - "Spring is here"

The EtsyMetal Team June challenge was
"Spring is here"
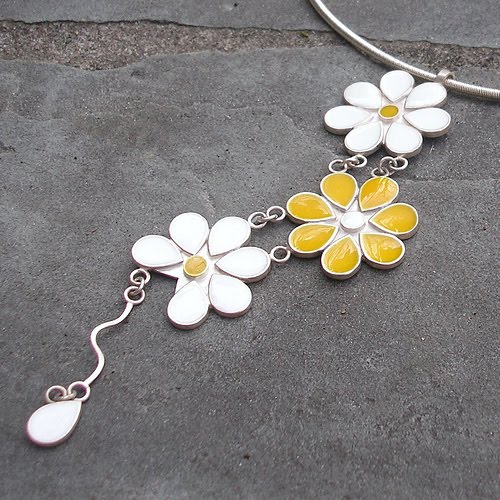
We were highly inspired by spring, as you can see from our June creations !


Andrea / ArtigianoJewelBox


Erga


Kerry Alice / Twigs and Heather

 Amanda Conley / Bijougirl Designs

  Kira Ferrer

The July team challenge, due to June 30, is
" The SUN "
 Can't wait to see what we will have !!!

Related Posts Widget for Blogs by LinkWithin
 
>