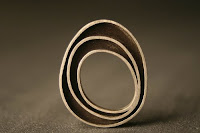
...and a Blog Button of your very own for you to take and put onto your website.
To put this button on your Blog, just right click on the image and save it to your computer. Go to your Blog, click Layout (or Design as it's now called), then Add a Gadget, scroll down to Picture and type http://etsymetal.blogspot.com/ into the Link box then add the button image from your computer into the Image box. Easy peasy lemon squeezy.
It was time for a fresh new header to the Blog, I was asked to do something a little like my etsyshop banner and so work began. I put the call out to members for 'letters' to be made in their own distinctive styles and quickly all letters were taken. After a few weeks the letters started to come in to me and I had to assemble them into a banner design on Photoshop. My own banner was made the old fashioned way by making the thing for real then taking a photo. Not having a clue how to do this on photoshop, I searched the web for tutorials on "collage techniques in photoshop", as I figured that was the closest thing to what I wanted to do. This is the best tutorial I found http://www.pxleyes.com/tutorial/photoshop/1439/Create-a-Wrong-Fruit-Collage.html by PXLeyes which taught me all I needed to know. Thankyou PXLeyes for your excellently clear and easy to understand tutorial, it's the first time it's made sense to me.
Originally I tried the letters out on different types of background;
...which looked cool, but...
after a vote of sorts, it was felt that the white banner we chose was most crisp. The above backgrounds are just 3 of dozens that I played with, and were images found on copyright-free sources where in most cases you don't even have to link back to the source or credit the owner. You can use them for personal or commercial use but not to sell them on as just the original images (check the Terms Of Use). I could have taken my own photo's even. These are just a few of the many sources that I found;
Of course, once I had a texture downloaded I could resize it to banner size. Ours is 800x200 pixels. A smaller blog banner or Etsy store banner would be 760 x 100 pixels, but you can play with sizing. Now, it's time for the roll call of participants. Find the members shops in the left Blog margin;
The sawframe "E" made on photoshop by FluxplayJewellery.
"T" by NinaGibson.
"S" by WildflowerDesigns.
"Y" by Heather of Twigs and Heather.
"M" by CynthiaDelGiudice.
"e" by BijougirlDesigns.
"t" by Kerry Alice of Twigs and Heather.
"a" by SarahHoodJewelry.
"L" by 2Roses.
"B" by BethCyr.
"l" by esdesigns.
"O" by HartleyStudio.
"g" by rubygirl
So if you want to do your own blog banner by collaging photos together onto backgrounds and tinkering with the images, or you want to put our button onto your blog (it'll link back to this blog), or make your own button (make it 125 x 125 pixels wide), then now you know how you can do it.

![[Most Recent Quotes from www.kitco.com]](http://www.kitconet.com/images/quotes_special.gif)


7 comments:
I love love the new banner! Bravo to everyone!
It looks soooooo good. Thanks to Maria for doing such a brilliant job organizing the whole project and putting it all together to make it look so fabulous!
OHHH!!! It it looks sweet!!! Excellent work Maria!!! All the letters look fantastic!!
Love it!!!
Great work everyone!
Yeah! It looks great!
Bravi! I think it looks great!
Post a Comment