![[Most Recent Quotes from www.kitco.com]](http://www.kitconet.com/images/quotes_special.gif)


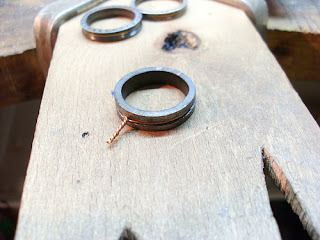
Heat colouring copper is a very experimental and unpredictable process, determined solely by the temperature of the metal. One of the main things to remember is to go slow, and to heat the metal slowly to achieve the colours you want. The Copper will go through a series of gold, orange, pink, purple, dark blue, and light blue, before turning black. Here are some tips on how to go about this process successfully:
- Cut and shape your piece of copper
- Complete all shaping
- BE SURE TO FINISH ALL AREAS WITH EMERY (SAND) PAPER BEFORE COLOURING. Any areas not cleaned properly will turn a brown colour, and you will have to clean the whole piece and start over.
- Holding the metal in soldering tweezers, preferably with the tweezers holding as small a space as possible, start “painting” the metal very slowly with the soft flame of the torch. You really only want the tip of the flame to "lick" the metal, and can even heat it from a bit further away. Be very careful and do this gradually and slowly, removing the flame frequently to check the colour. If you heat past the colour you want, you will have to re-emery the surface and start over.
- The metal should turn a gold colour, then orange, pink, purple, dark blue, and light blue. Because the process is so unpredictable, it is normal for parts of the metal to turn one colour and not cover an even surface, although this can be manipulated with small amounts of heat.
- Once you reach the colour you want, remove the flame and blow on the piece of metal, to slow the process of changing colour. The colour may or may not change in this step, so it is advisable to watch the colour closely and remove the flame prior to the metal changing to the colour you want.
- Place the copper piece aside in a place where heat will not reach it. Be careful that you place it on a clean surface—otherwise you may end up with solder or other dirt sticking to it and ruining the piece.
- Many people have inquired about what to coat the pieces with to prevent the colour fading or oxidizing. I have tried wax and it has completely removed the colour. It has been recommended at http://www.finishing.com/2600-2799/2662.html that you use an oil-based polyurethane coating. I do not coat my pieces as the colour seems to hold up well, and have tried polyurethane coating, which made the piece turn orange.